
1st Place Byakuya Deck (Vol. 3) – UNION ARENA
Ready for yet another round of Byakuya? I’ve loved playing Byakuya since the very early days of UNION ARENA. While Byakuya actually felt pretty good back then, Vol. 2 didn’t do a ton for it as a strategy. It was missing a little extra something to feel like a viable deck in its own right. Well, thanks to the cards released in the BLEACH: New Card Selection, Byakuya feels much, much stronger than ever. Indeed, it’s kind of terrifying what this deck can do when piloted correctly.
Below, I’m going to be walking you through my custom Byakuya build that I used to get first place into a very meta-heavy tournament.
Byakuya Kuchiki UNION ARENA: BLEACH Purple deck history
Although it’s a deck that’s only been out for a little over a year, it’s also one that’s change a lot since it came out. My first ever Byakuya deck may be something of an eyesore given where we’re standing now, but I did actually manage to win some early UNION ARENA tournaments with this crazy build.
Byakuya Vol. 1
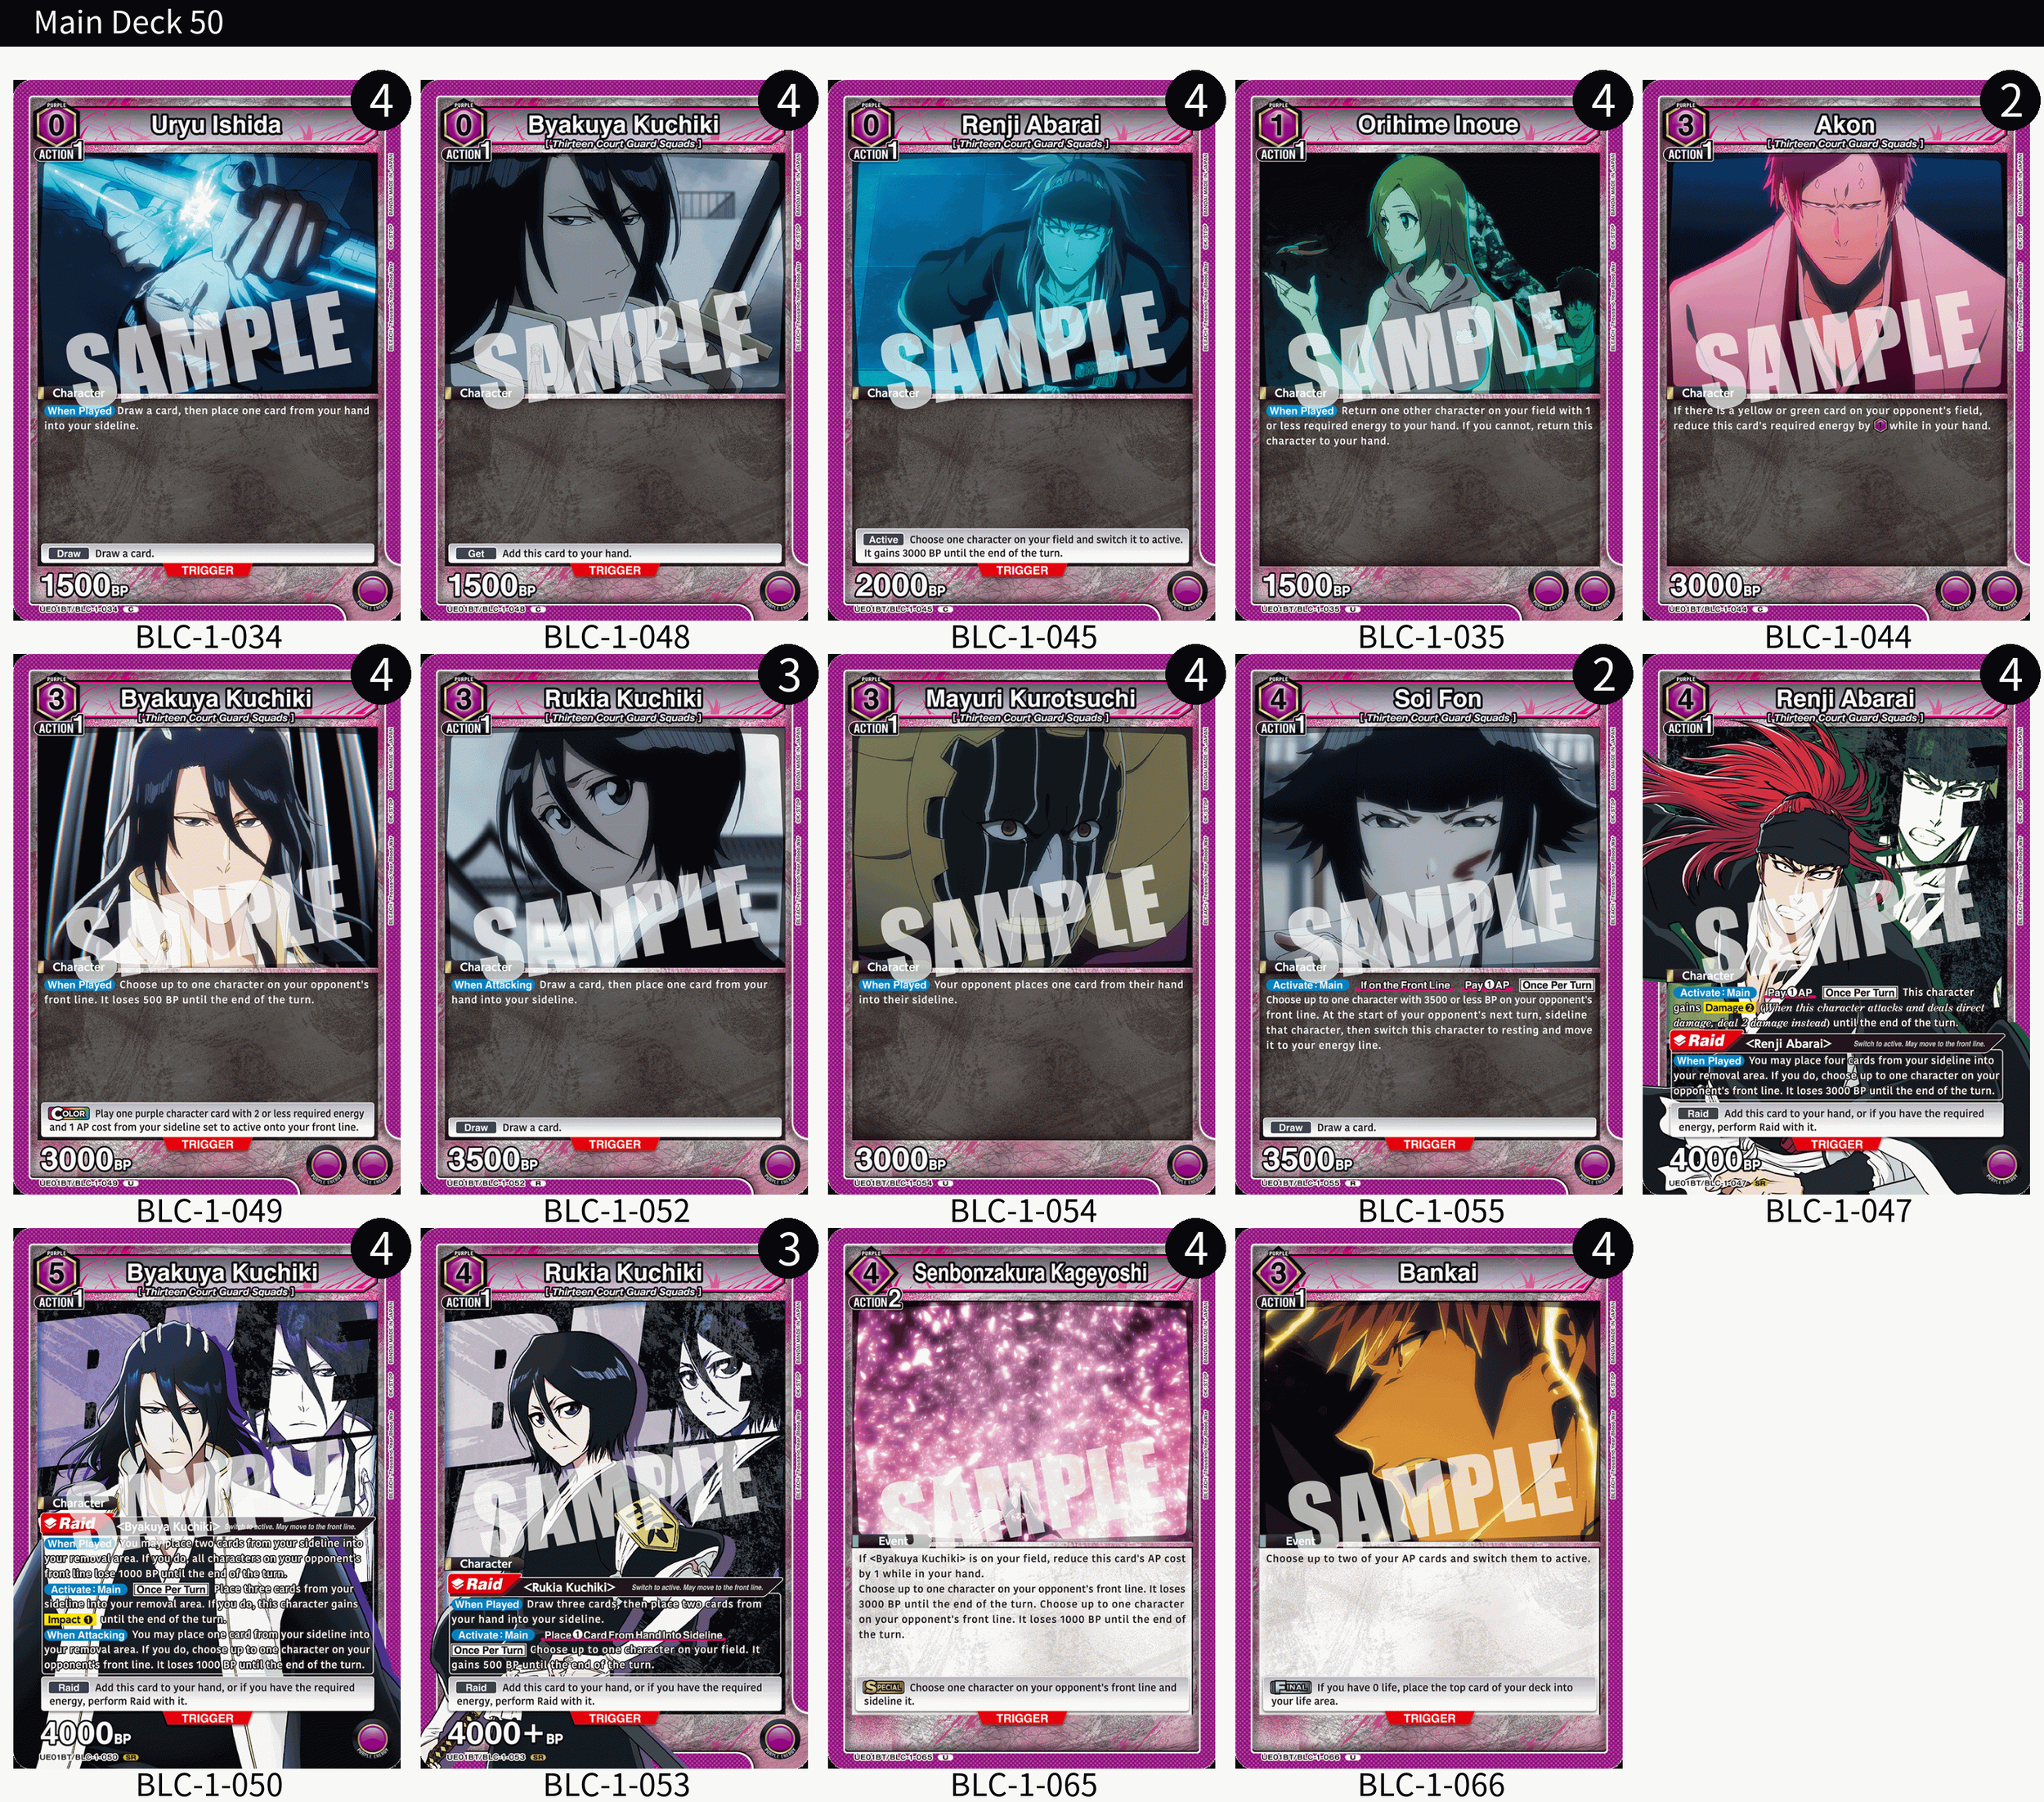
There’s just so many things about this original Byakuya deck that feel kind of gross given how consistent and effective contemporary UNION ARENA decks are. The worst thing about running Purple BLEACH back in those days was just the 3/3 Rukia character cards. However, it’s the best we had, and today we’re still not there without our zero cost Rukia. As ugly as this looks now, it was pretty standard to run a Rukia package like this in Purple BLEACH decks back then, making it relatively standard.
However, there are three other crazy techs in this deck that are totally out there.
First is the three-cost Akon. However, Kurapika was the majority of competitive meta back then, making running Akon almost worth it.
Second, Soi Fon was something of a short-lived tech in Byakuya decks. Theoretically she fits in as she can force your opponent to sideline a character that’s been reduced by Byakuya’s effects. However, she really isn’t the greatest card and she quickly faded out of Byakuya builds.
Finally – and the weirdest tech– was the three-cost Mayuri. Mayuri’s main thing is just forcing your opponent to discard a card. It was an interesting tech I ran probably partly out of boredom given how limited deck building was back in those days in UNION ARENA (despite it still being an awesome game). As good as forcing your opponent to discard can be, it’s not nearly enough to justify how back mayuri is overall.
1st place Byakuya Vol. 2 deck
Although I attempted to run a pure Byakuya build in Vol. 2 (given the set definitely had the support for it), it just felt a little lacking when compared to Ichigo, so I went for a hybrid build. This build mostly worked until I tested it one night and found myself rarely actually wanting to find Byakuya. This build works fine without the Byakuya package and just going harder into Ichigo. Despite winning a tournament with it, I dropped it by the time Rare Battles came around.
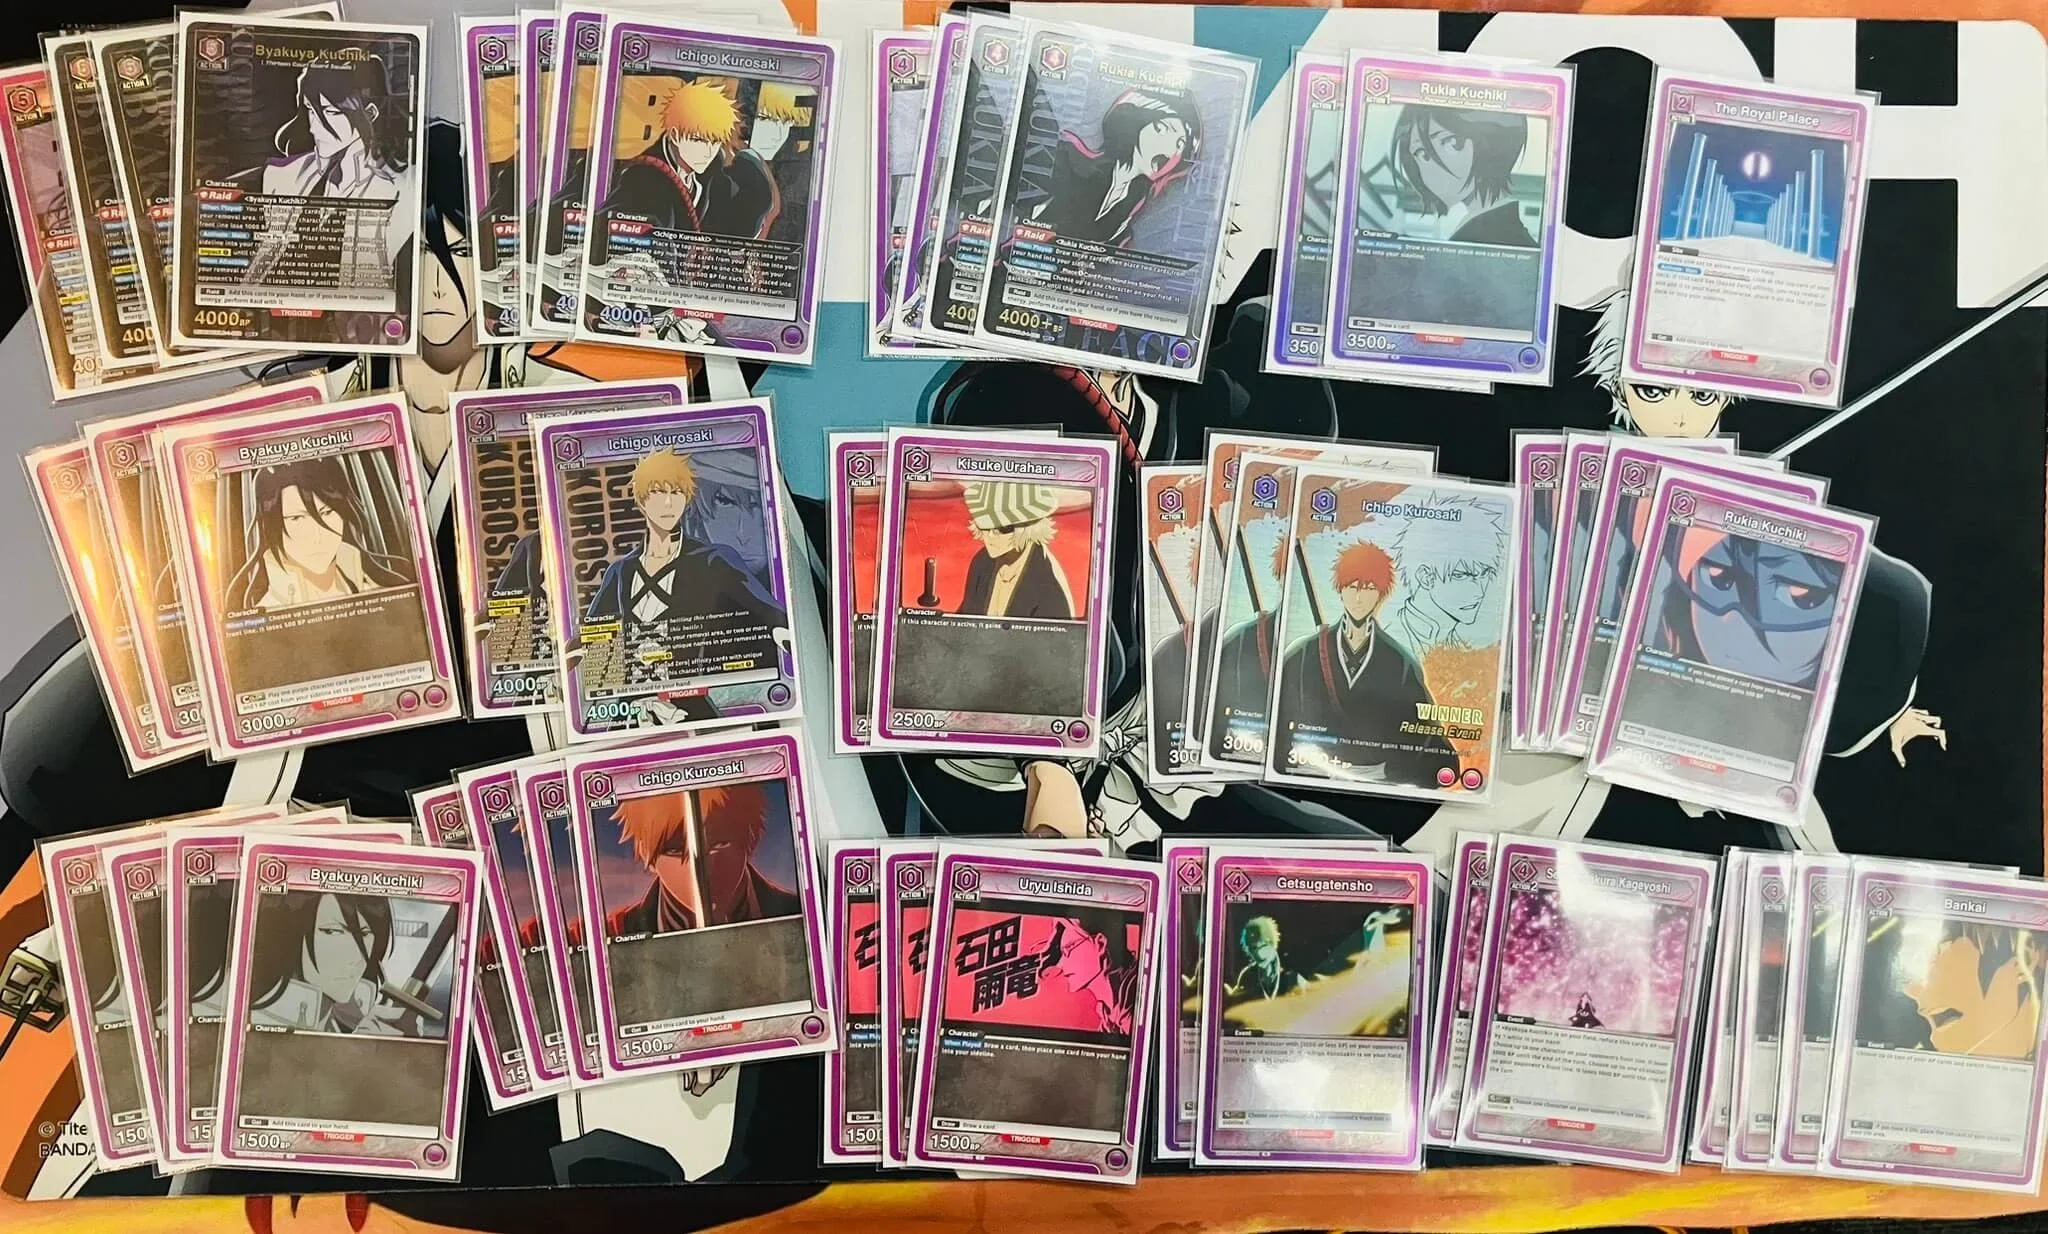
1st Place Byakuya Vol. 3 Deck List
The BLEACH New Card Selection makes Byakuya far stronger than ever
Flash forward to the present day and BLEACH feels much, much stronger than ever before. Byakuya in particular gets a huge buff in the New Card Selection, and it’s one that could very well establish the deck as a contender for the upper tiers of UNION ARENA.
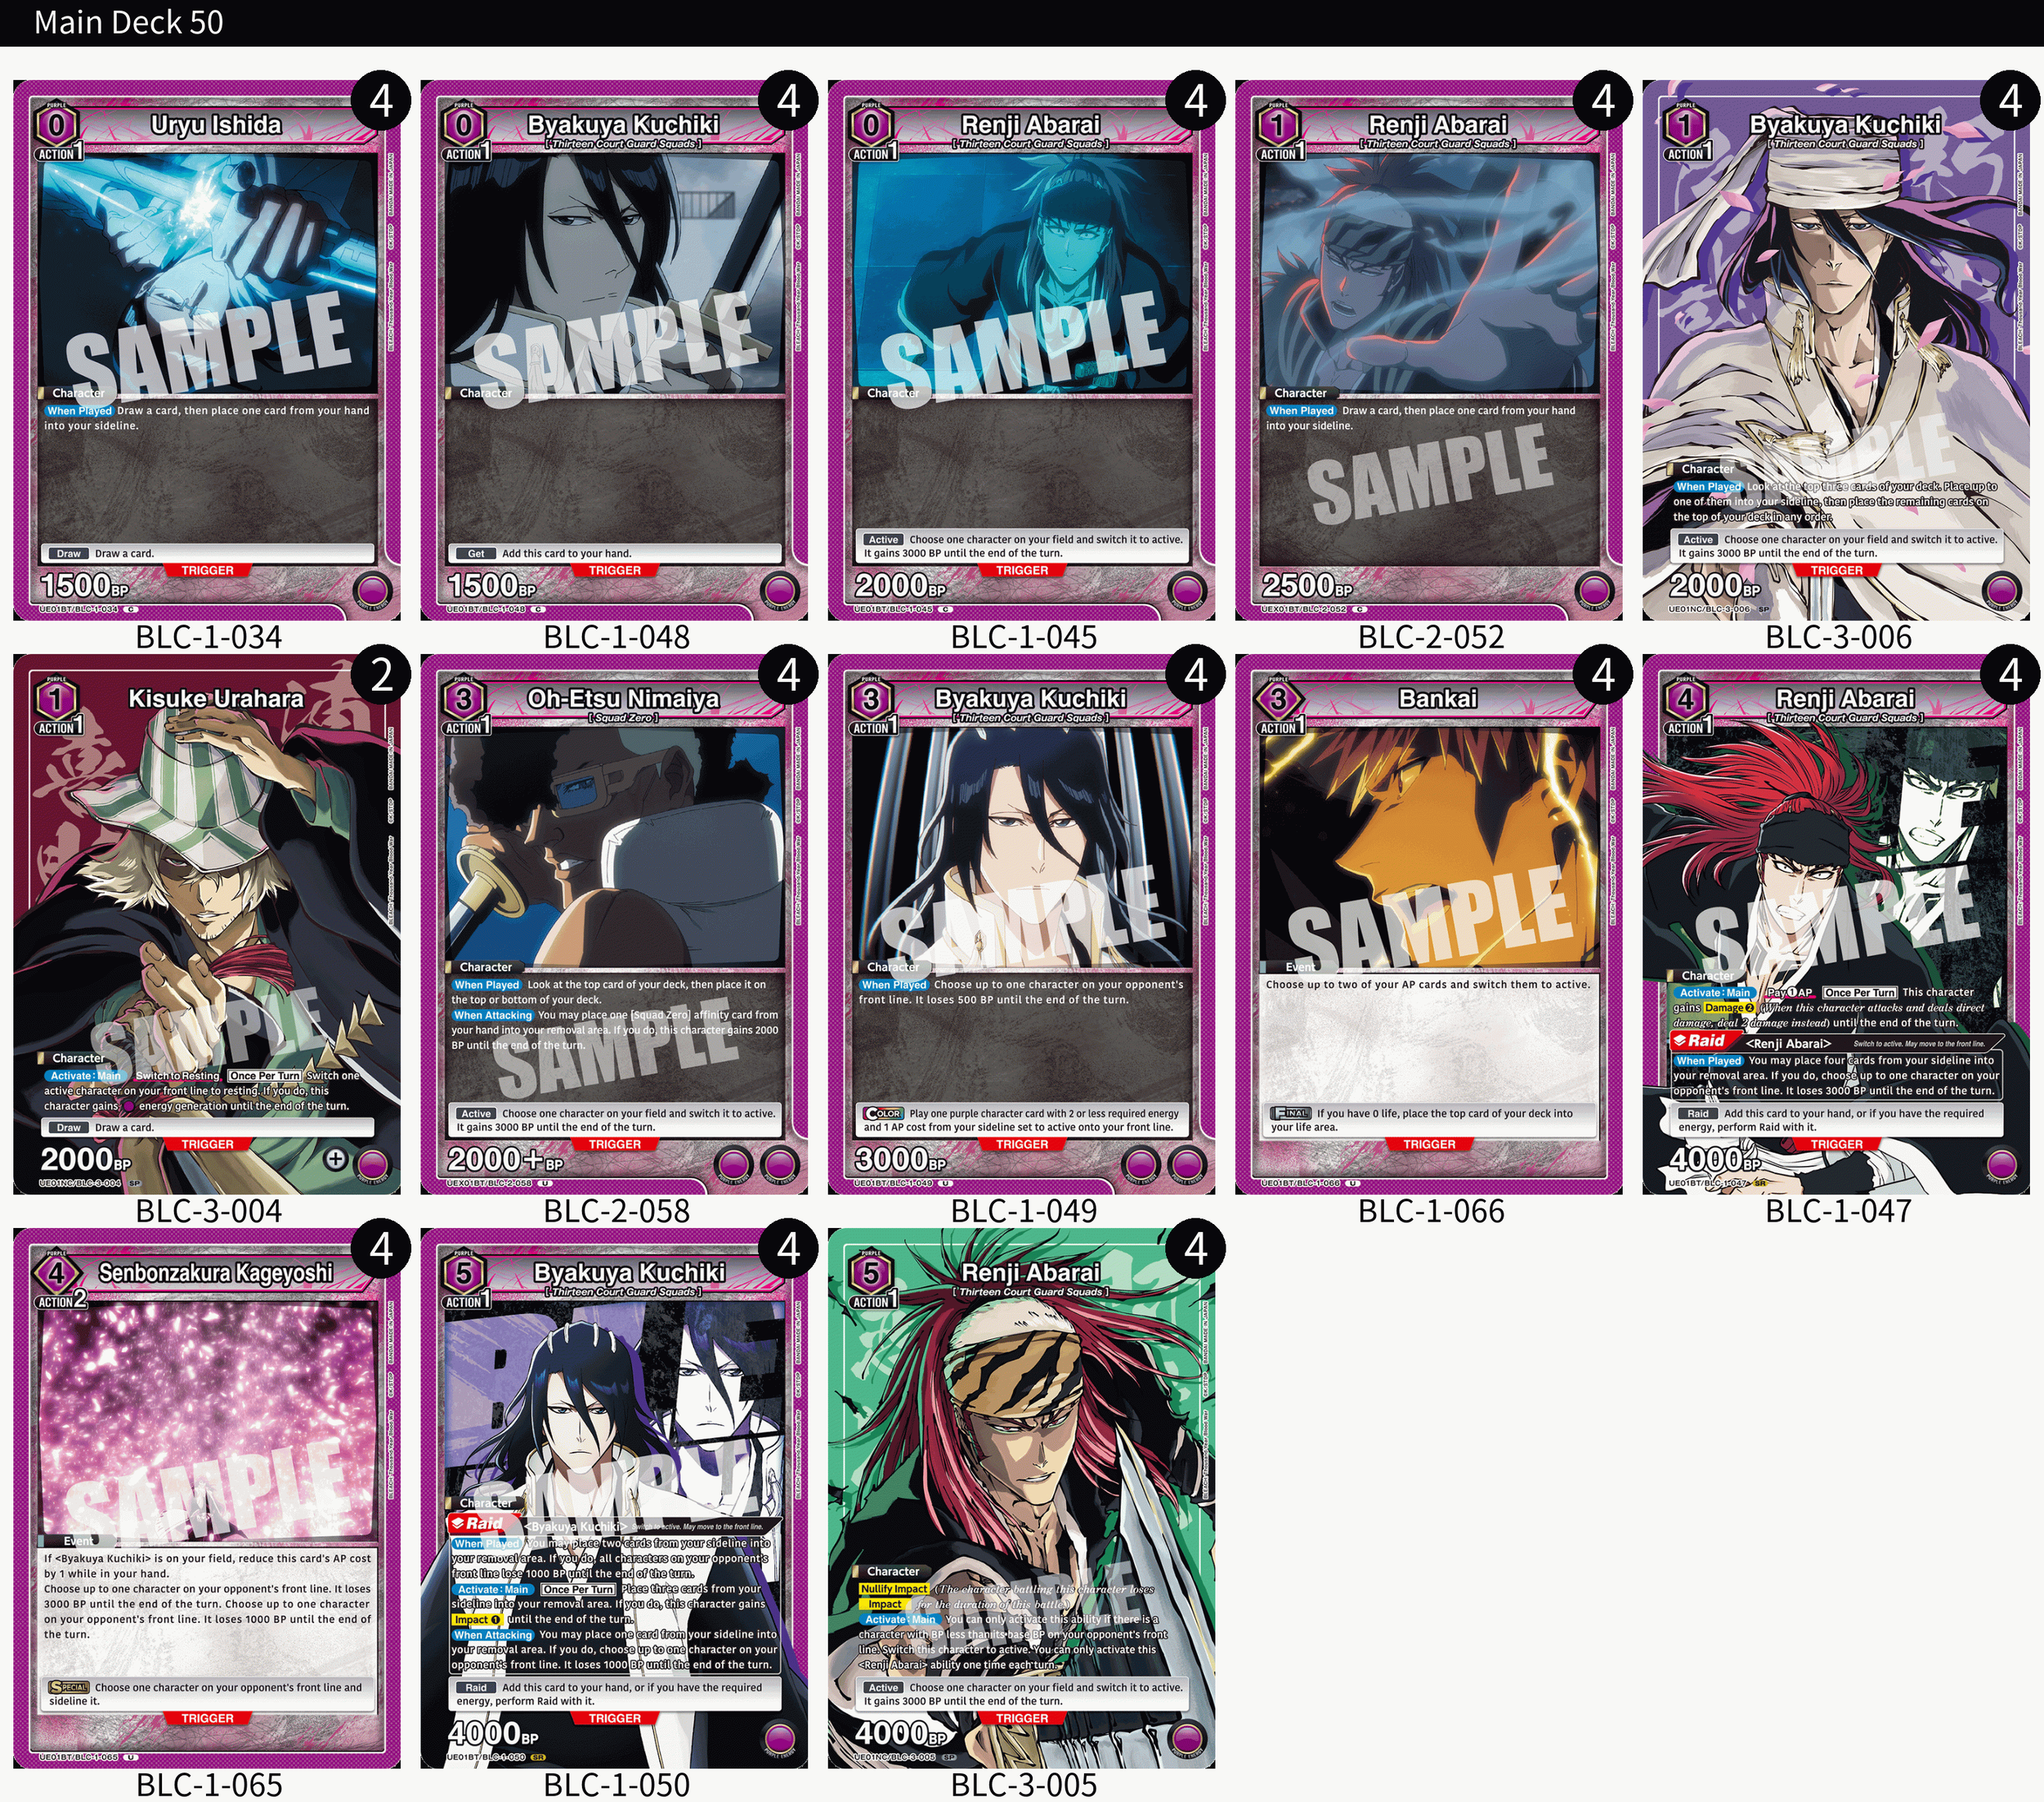
By far, the strongest new card it gets is the formidable five-cost Renji.
Five-cost Renji is your new star attacker
I’m going to be honest – when I first looked at this guy on paper before the New Card Selection actually came out I didn’t get him. After play testing the deck, however, and topping a challenging tournament with him, however, I am a huge believer in Renji. Renji is an insanely powerful card and pairs particularly well with Byakuya, letting you very quickly blitz down your opponent with relatively little set up and without overextending your energy line on a raid.
Being able to plop down a three-cost Byakuya with BP reduction then play two of these or more if you have an AP extend feels incredible, and posses a really threating play to your opponent that can easily overwhelm them if they aren’t looking for it.
Of course, having Nullify Impact on a raidless character like this grants added utility. Despite the fact that four-cost Ichigo can boost to Damage 2, Renji feels like the stronger of the two, at least given how well it pairs with Byakuya.
One-cost Byakuya is incredibly good
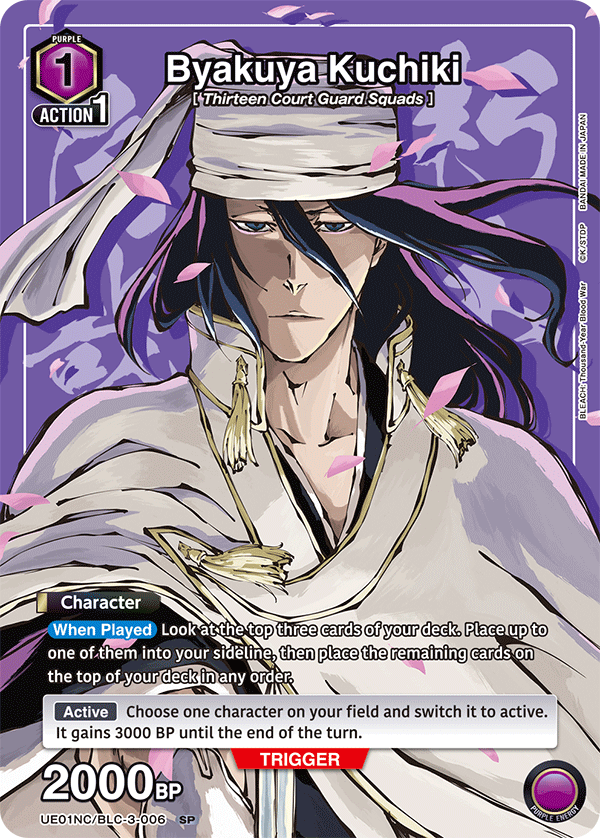
Five-cost Renji may be your strongest new card offensively, but one-cost Byakuya is also insanely good, letting you stack your deck to be more optimal for you, while also letting you add one to the sideline if you want. Having the active trigger means making it easy to reach a very high number of Active triggers in this deck. My build has an insane 16 Active triggers, meaning odds are fairly good you’ll be hitting one during your game off of life. While that may not be a huge deal, it makes this deck considerably more resilient – something that can help in close matches to edge out the game for you.
Kisuke can enable some early game aggression
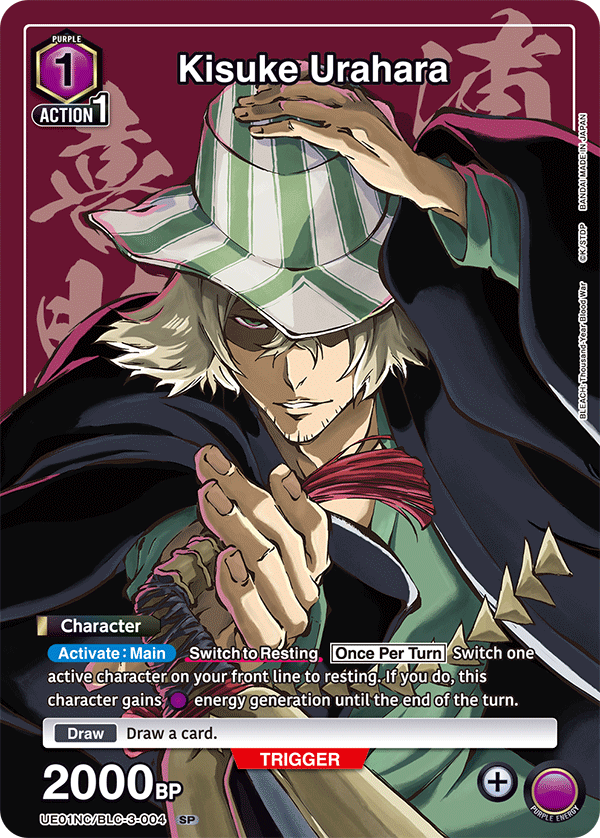
The one card Byakuya gets that is just sort of okay is the one-cost Urahara. Urahara is a great character to help you enable some early game aggression. However, it’s not very good past that point, making him really more of a tech option than a core energy-generating card. Run him if you have room, otherwise don’t feel too bad leaving him out.
Byakuya Vol. 3 deck tournament matchups
Now to the fun part! How does this deck hold up into the UNION ARENA meta? Let’s take a look at each of my matches from the tournament to get a better idea.
Round One vs. Kikoru (Yellow Kaiju No. 8)
Round one was against Kikoru. Kikoru had way too slow of a start, however, to really be threatening. Kisuke was critical in this match as he allowed me to get going and push up and be aggressive to out aggro the aggro deck. Once my board was set up and my opponent wasn’t any where near closing the game out, I knew it was over.
Round Two vs. Yellow BLEACH
This round started out strong for me. Ill I had to do was build up my energy line, and then play out a couple of Renji, coupled with a Byakuya Raid to remove chump blockers. That combined with solid removal and early game chump attacks put my opponent far, far too behind to catch back up.
Round Three vs. Red Kenshin
Red Kenshin is a really, really scary deck if it gets what it needs upfront. However, my opponent had a less than ideal start and couldn’t keep up with the aggression Byakuya’s Vol. 3 deck can unload. Again, the five-cost Renji’s were the star of the show here, letting me put on plenty of aggression without overextending the energy line, while my consistency pieces helped me find what I needed well ahead of my opponent who stalled the first two turns.
Round Four vs Purple Saito
The final round was also the toughest, and was actually against a friend of mine who had just tied with me for second at a case tournament where he played the same Purple Saito deck and I played Kenpachi/Toshiro. Again, I had a pretty insane start and got way, way ahead of my opponent largely through my five-cost Renjis and a few solid Renji Raids as well.
However, I only saw one Byakuya Raid which prevented me from applying the kind of Impact pressure that I needed, and so the massively fast start began to run out of steam, and I only ended up barely scraping away the victory with one life left.
Clearly, Byakuya is a strong deck – one worth consideration from anyone who is interested in what the enhancements bring to the table. I highly recommend it for anyone looking for a strong deck with plenty of combos that make the payoffs feel massively rewarding.